Most people can perform squats. These can be used for a wide variety of goals in training. This guide will outline in detail the movement, will teach you how to optimize your squat technique and how to start maximizing your workouts.
Biomechanics for Squats:
This is the most technical part of the guide, therefore, try to be brief and clear in the explanations.
To make this section a little easier to understand, you must understand the planes of motion. There are three basic planes: sagittal, frontal and transverse.
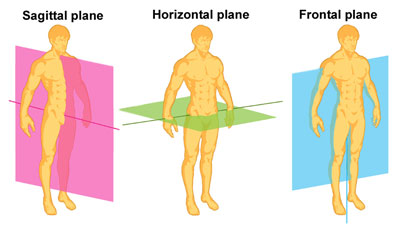
– The sagittal plane cuts something half from top to bottom and front to back, and where the flexion and extension occur.
– The frontal plane cuts something in half from top to bottom and side to side, and is where the abduction and adduction take place.
– The transverse plane cuts something front to back and side to side, and where the rotation takes place.
Once we know the plans and movements I present a crucial point: abduction, adduction and rotation are defined by the frontal and transverse planes relative to the torso. The flexion and extension, on the other hand, are defined relative to bones and joints where they occur.
There are four basic challenges that must be overcome in a squat:
- Spinal flexor moment.
- Hip flexor moment.
- Knee bending moment.
- Dorsiflexor ankle moment.
1. The spinal bending moment depends on two things:
- The horizontal distance (perpendicular to gravity) in the sagittal plane (relative to the torso) between the bar and any intervertebral joint.
- The load in the bar.
2. The hip flexor moment depends on two things:
- The horizontal distance in the sagittal plane (relative to the femur) between the centre of mass of the system (the bar plus the weight on the hip) and the hip.
- The total load above the hip (bar weight and body weight).
3. The knee flexor moment depends on two things:
- The horizontal distance in the sagittal plane (relative to the femur) between the centre of mass of the system (the bar plus the weight on the knee) and the knee.
- The total load above the knee (bar weight and body weight).
4. The dorsiflexor ankle moment depends on two things:
- The horizontal distance in the sagittal plane (relative to the tibia) between the central pressure on the foot and the centre of the ankle joint.
- The total load (bar weight and body weight).
Now that we have defined the basics of squat biomechanics let’s start with the technique.
The Squat Guide
There are three key components of the Squat: the setup, the descend (eccentric) and the ascend (Concentric).
There is some variation from the descent and ascent; there may be some detail that works well for some people and not so well for others. However, they are pretty similar for most people. Those two movements may look a little different, but the underlying signals and demands are quite similar.
The setup on the other hand, has much more variation. People feel more comfortable in a squat bar with different positions, different widths and foot posture, different grips, etc.
Setup
For most of the topics in this section, there are very few rules clearly better or worse. There are only several approaches that are more or less effective for different people. This section covers the variety.
1. Placement of the bar:
There are three basic positions of the bar to perform a squat: high bar, low bar and front bar. In the high bar squat with the bar resting on your trapezius; in the low bar, the bar rests on the rear deltoids; and the front squat, the bar rests on the above deltoid or the gap between the anterior deltoids and trapezoids.
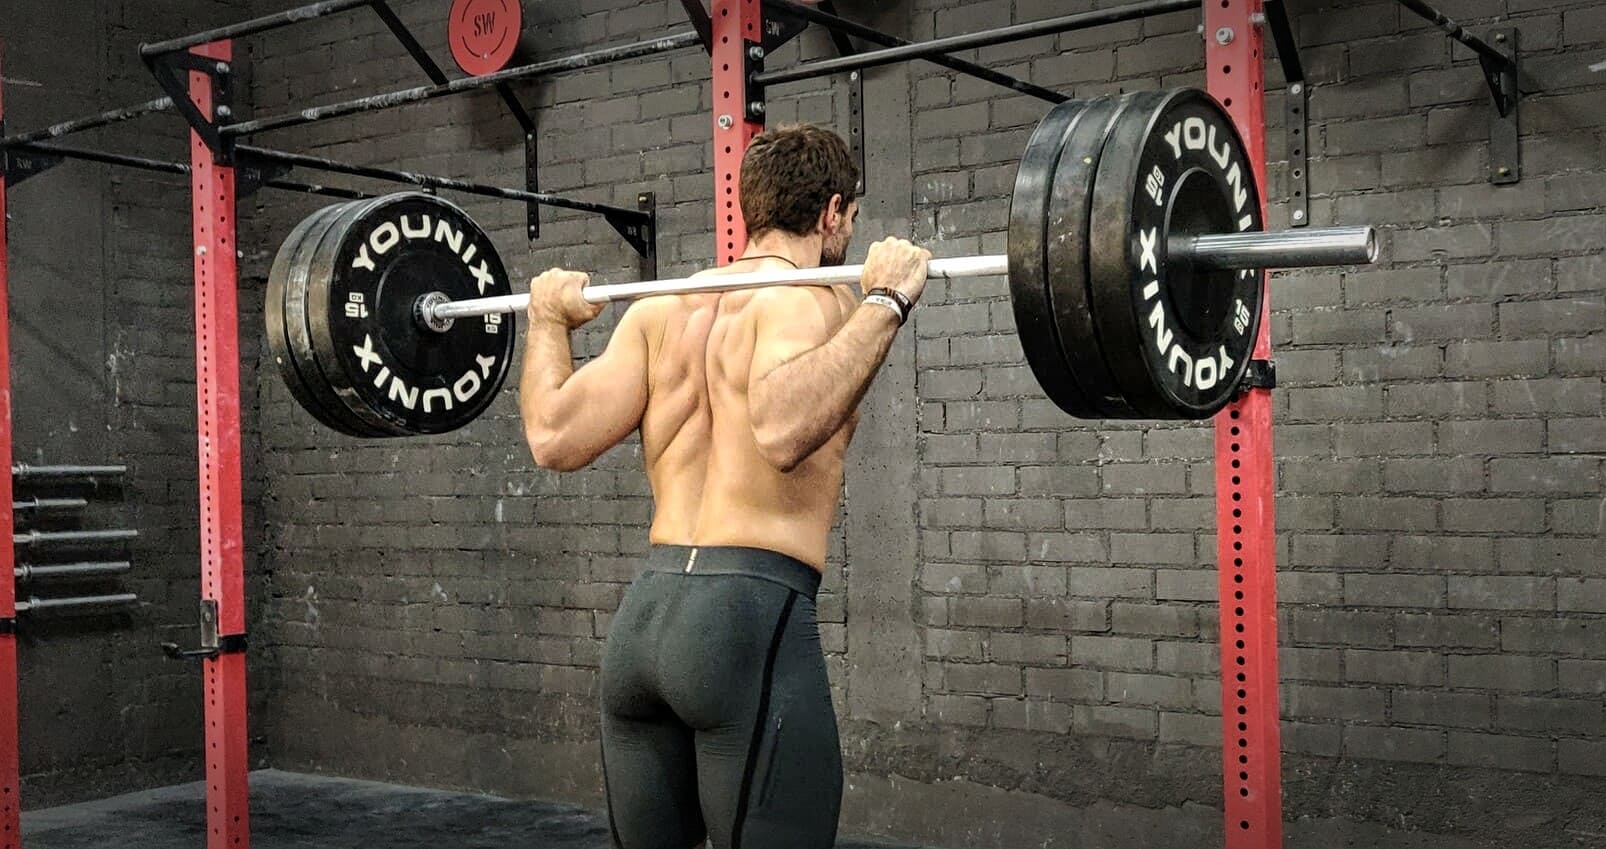
High bar placement
In a high squat with a bar, the bar rests on your trapezoids. Depending on the person, you can feel the most comfortable bar on the upper part of the trapeze, or you can feel the best by resting a little lower on the flesh of the trapezoids. You also have to check how you feel better, if by actively retracting the scapulae to tighten your trapezius or instead of a more neutral scapular position.
What should always be avoided when placing the bar for the squat with a high bar, is to place the bar on the C7 vertebra (the small bony protrusion at the base of your neck). When people complain of neck pain when doing squats and think they need to use a bar pad to relieve discomfort, it is usually the mistake they are making.
Low bar placement
In the squat with a low bar, the bar should rest on the posterior deltoids. As we have said before, with the pain that appeared in the C7 vertebra when a squat with a high bar was performed, some people feel discomfort in the shoulder blades when doing squats with a low bar. That usually comes from letting the bar rest directly on the spine of the scapulae. Simply moving the bar a little higher and retracting the shoulder blades, discomfort disappears. For both the high and low bars, you must actively join the shoulder blades.
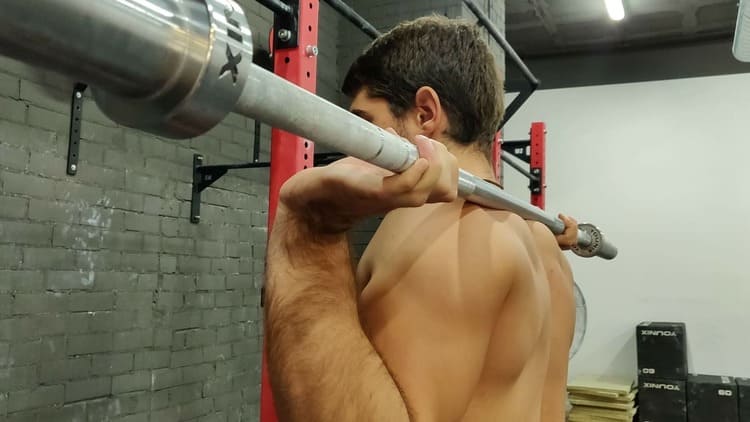
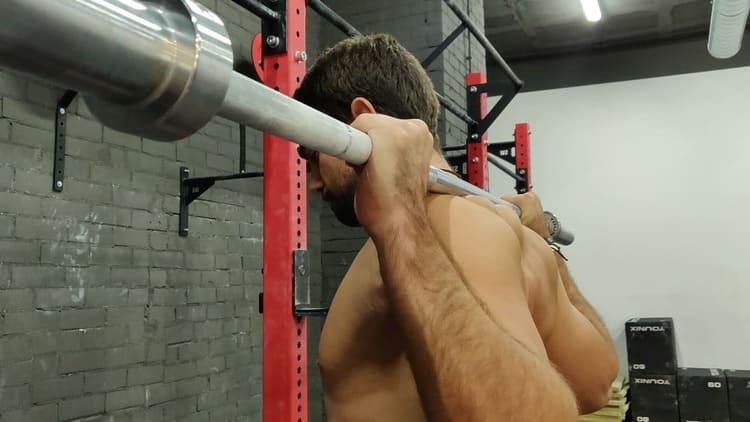
Finally, in the front squat, the bar should rest between its anterior deltoids and the anterior part of the trapezius. If you feel discomfort in the sternoclavicular joint (where the clavicle meets the sternum) do not perform it. Obtaining slightly higher anterior deltoids may help a bit, but in reality, the front squats are uncomfortable until the nerves under the skin where the bar rests are “cushioned”. It is almost certain that you will have bruises somewhere along the collarbone, especially when you try them for the first time.
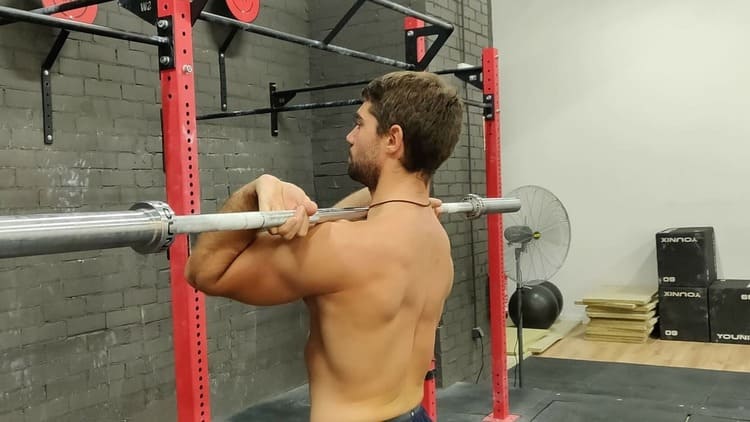
Front squat bar position view 1
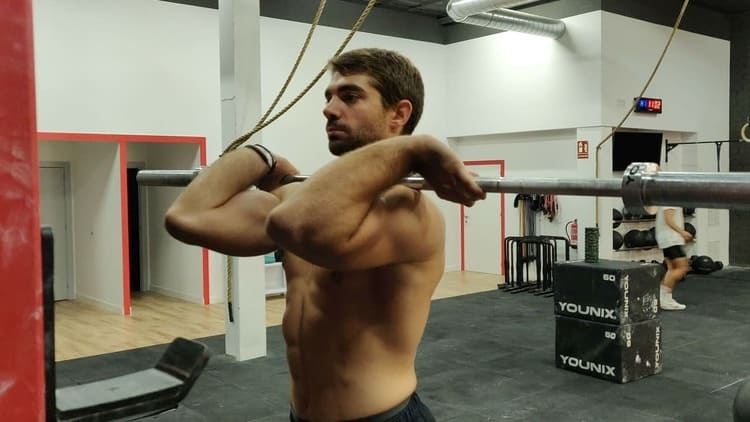
Front squat bar position view 2
2. Hand position:
In general, for the squat with a high and low bar, a narrower position of the hand will help keep the upper back a little tighter and more stable. When you bring your hands inwards, your scapulae naturally have to retract more strongly (so the middle and lower trapezius will be tighter, along with the rhomboids), and your shoulders will naturally tend to adduct (tighten your dorsals a little). With a wider position of the hand, you can still consciously tighten the muscles of the upper back, but it is much easier and you will feel in a more natural position, by creating tension in the upper back with closed hands.
In general, your hands should always be as close as possible to comfort. If you can approach them without pain in your wrists, shoulders or elbows, or you just feel very uncomfortable, then you will probably benefit a little by doing so.
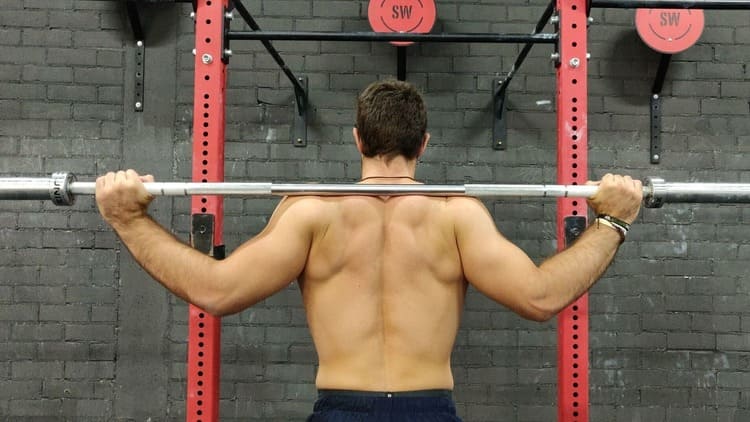
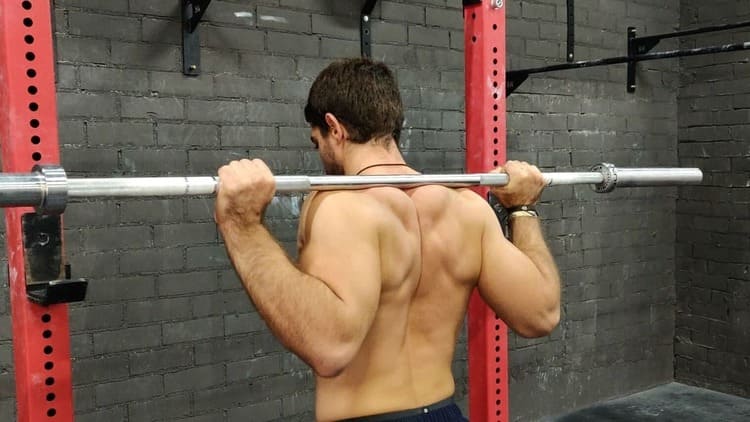
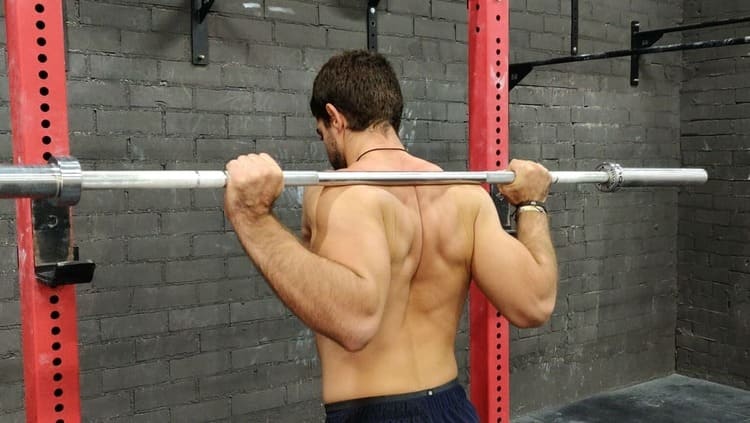
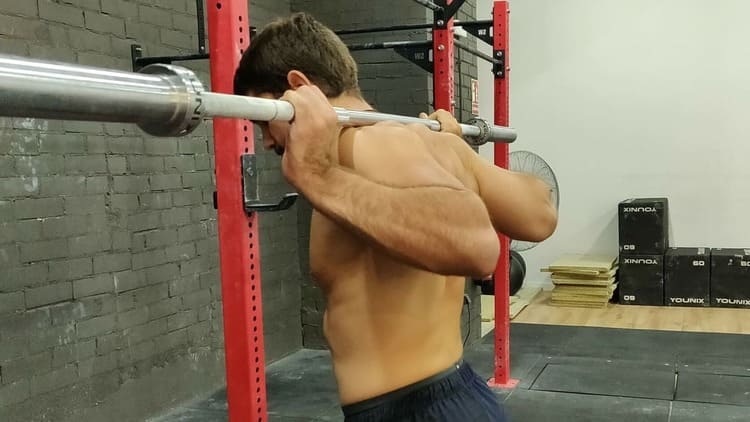
Too wide hands grip
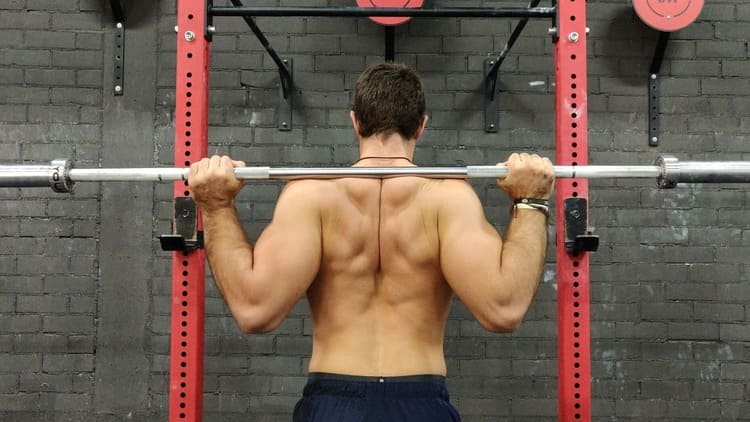
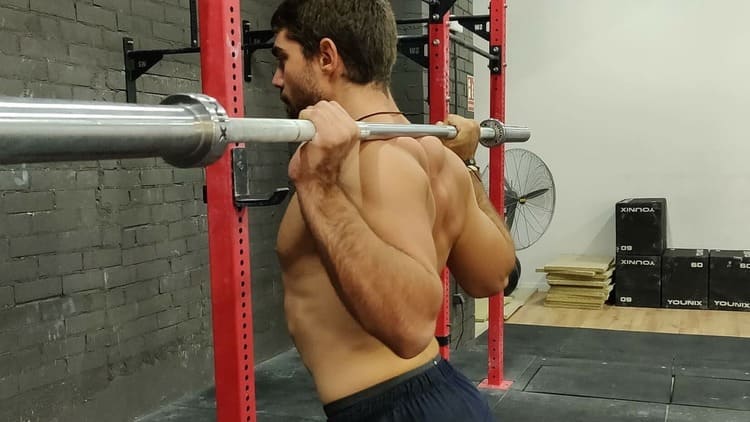
Proper hands grip width
3. Wrist position:
The wrist position is not too important consideration for the back squat if you are creating a stable enough area for the bar with your trapeziums or posterior deltoids. If the trapezius and posterior deltoids support (essentially) the entire weight of the bar, the bar will not slide down the shoulders, so it does not matter much if your wrists remain straight (neutral) or if you let them extend.
Not correct wrist position
Proper wrist position
4. Elbow position:
In general, the elbows should be pointing down and to the sides of the ribcage, as if you wanted to ‘scratch your chest with your elbows.’ This will help create tension in the lats, which will help torso stiffness and tension in the upper back.
Not correct elbow position
Proper elbow position
5. The exit:
The first thing you need to decide is the height of the hooks from where you will get the bar. You should be able to place the bar on the hooks comfortably without having to bend down and do half a squat, or stand on your toes to place the bar on the hooks. This should be common sense. However, I still see many people who put the hooks too high, so they have to stand on tiptoe to remove the bar from the rack. Not only is it stupid, it is dangerous. Starting with hooks that are too low is a bit less common, and it’s not that worrisome, but it will mean a waste of energy raising the bar even before you are ready to squat.
Remove the bar from the rack by pushing the shoulders toward the bar aggressively. Many people believe that, especially with very heavy loads, disarming the bar aggressively makes the weight feel less intimidating than disarming the bar with caution. Start with your hips slightly behind the bar, breathe deeply into your stomach, tense your back and lift the bar from the hooks by pushing your hips under the bar and moving the floor away from you.
You should remove the bar from the rack as efficiently as possible so you don’t waste minimal energy before starting the squat. This means taking as few steps as possible. You should get far enough away from the rack so you don’t accidentally hit the hooks during the movement, but you don’t want to spend more energy than necessary, or take big steps that could cause you to lose your balance.
The most common output is the two-step output. Once you lift the bar, step back with one step (preferably the dominant leg), then back up the second foot until they are at the same height. Finally, if necessary, make a small adjustment in the direction in which the toes point.
Two step exit
Three step exit
At this point, you should have the bar positioned comfortably and stably (or perhaps not as comfortable, but at least stable).
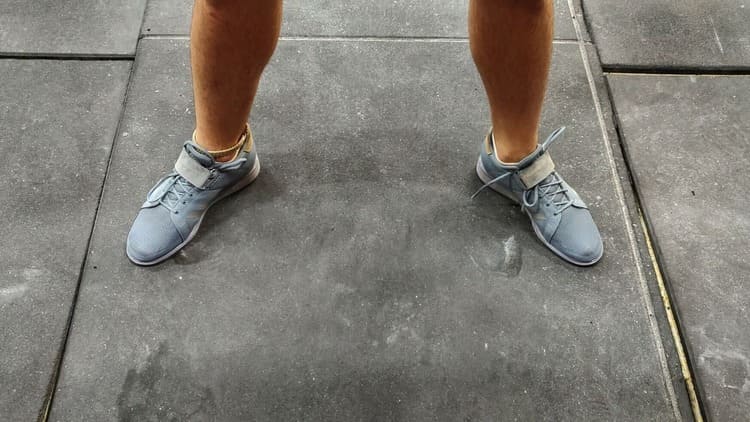
6. Feet width:
The next problem is finding the width of your posture. Here there is only one main consideration: comfort.
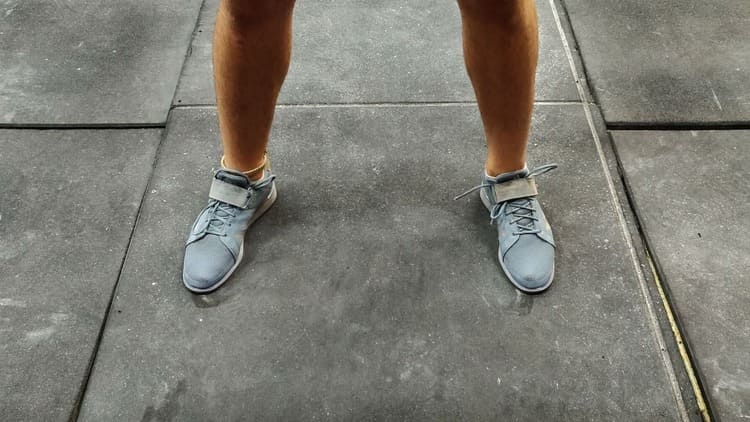
Average feet width
It is not necessary to complicate this. Simply vary the width of your posture and check which sensation is most comfortable for you. You can do this only with the bar if you are new to squats, or with a reasonably heavy but not too challenging load (think 50 – 60 per cent of your 1rm) if you have more experience, but think you change your posture in the squat It could increase your performance. Simply start around shoulder width and bend down. Analyse your feelings. Then try again one or two centimetres narrower. Then the same, but wider. Let your body tell you how to do squats. Check the depth of the squat with each posture width without rounding your back, the stability and comfort of each position. Stay with the one that gives you the best combination of depth, comfort and stability.
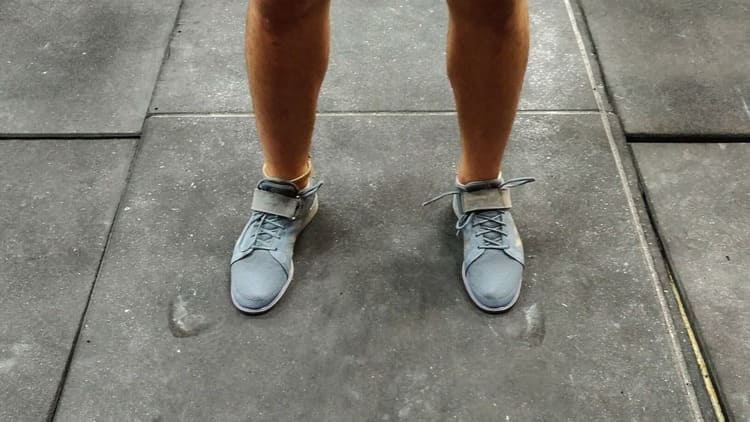
Small feet width
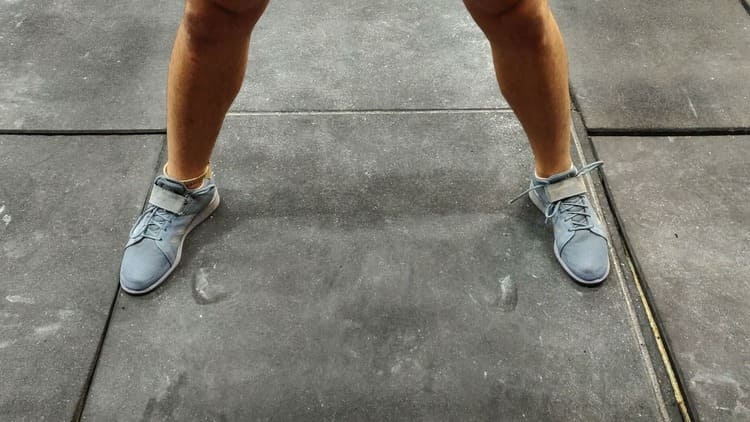
Large feet width
7. Feet angle:
There are two main considerations when talking about the angle of your feet: balance and knee health.
Knee health:
In general, your best option is to let your hips and knees determine the angle of your feet.
Large feet angle
Once you have experimented with your posture and your hip abduction, simply adjust your feet in the same direction as your knee. Therefore, if you have a more open posture with more hip abduction, the toes may tap at a greater angle (30 – 45 degrees). Otherwise, if you have a more closed posture with less hip abduction, the toes should have a more closed angle (15-25 degrees).
Balance:
The only exception to the general rule of letting the position of the knee dictate the position of the toes is for athletes who perform the squat with their feet wide apart and with a lot of hip abduction.
Many athletes begin to have balance problems when their feet mark an angle greater than 45 degrees. This happens because with this position the feet shorten their contact surface if they are observed from the side. Sometimes, this can make it easier to lose balance or fail to lift.
If this is what happens to you, reduce the angle of the foot, as well as the hip abduction. You have to reduce both parameters because if there is no pain in the knee.
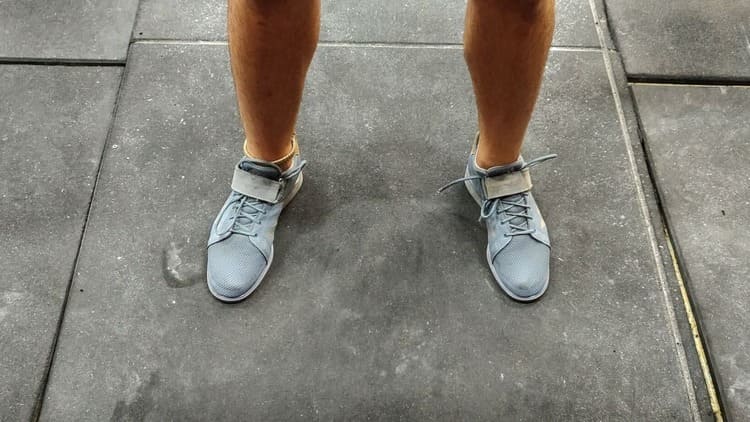
Small feet angle
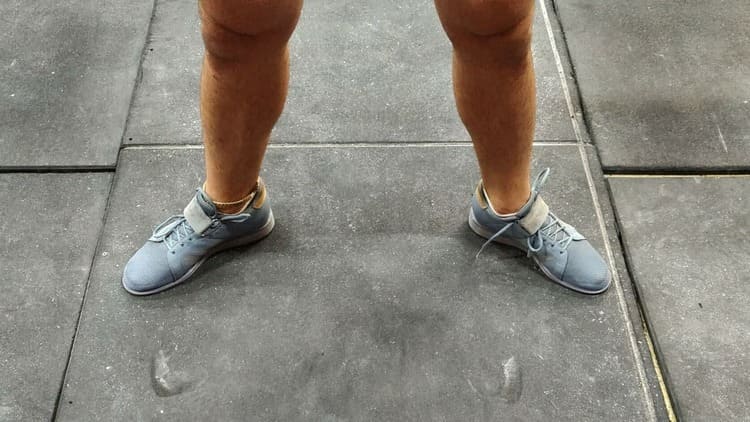
Too large feet angle
8. Bracing:
Performing a good bracing is crucial for a heavy squat. It doesn’t matter how strong your legs are if you can’t but can keep your torso stiff.
There are two key factors to develop the stiffness of the torso: the strength of the spinal extension and intra-abdominal pressure.
Spinal extension:
For more experienced lifters, this is usually a problem of strength, and it can be a long way to work that force as safely as possible. However, for beginner lifters, it can be a control / skill problem, because they are simply not accustomed to actively tensing their spinal erectors and maintaining that tension with a bar loaded on their shoulders. Most people with some degree of proprioception will be able to perform this active contraction in a short time. A bar loaded on his shoulders is always a good teacher.
Proper Bracing
Intra-abdominal pressure:
Intra-abdominal pressure is higher with a belt than without one. This is the main reason why people can squat heavier with a belt.
Intra-abdominal pressure is higher when you take a diaphragmatic breath than when you perform a classic chest breathing. When you inhale, you should feel a 360 degree expansion.
The intra-abdominal pressure is higher when you hold your breath and perform the valsalva manoeuvre (as if you were trying to exhale strongly while closing your throat and mouth so that no air comes out).
One last point about bracing: it’s not just about ‘tensing the abdominal area,’ and realistically, abdominal strength probably doesn’t affect squats to any significant degree.
In short, developing the necessary stiffness of the torso for a squat depends on the strength of your spinal erectors, combined with the ability to perform a brace. While the strength of your abs, oblique and transverse is probably not going to be a limiting factor.
9. Create maximum body tension:
At this point you only have one more thing to do, tighten even more.
Create tension with your feet
That starts on the floor. You should make sure you have three solid points of contact: the big toe, the little finger and the heel, with your weight evenly distributed across the three points. This will help you maintain balance, and keep your centre of gravity in the central part of the foot.
Creating tension with the legs
With your feet firmly planted on the ground, try to rotate your hips externally, as if you were trying to separate the ground under your feet. You can feel the outside of your foot contact firmly against the outer wall of your shoe.
To create even more tension in the back squat, try folding the bar over your shoulders, as if trying to fold it in half. In the front squat, bring your elbows as high as possible.
The Descent
1. There are two basic ways to start the descent: sitting down and sitting back.
When you sit down, you start the movement by bending your knees and hips simultaneously and try to drop your buttocks directly between your heels, keeping your torso as upright as possible. This is the most used technique for weightlifters.
When you sit back, you first flex your hip and push your butt back, as if you were trying to sit in a chair behind you, which allows your torso to lean a lot, then you begin to flex your knees. This is the most common technique among powerlifters.
Sitting down
Sitting back
2. The next key factor is the rate of descent.
In general, your best option is to descend as quickly as possible without losing total control of the bar.
A faster descent can help you get a little more ‘bounce’ from the bottom of the squat through the stretch reflex (when your muscles stretch quickly, they naturally contract with a little more force when you reverse the movement), but a little extra speed is not very useful if you have lost control over the bar.
3. Depth.
My simple answer: as low as his body I let him go. However, keep in mind that there is some variability in the depth that people can reach (mobility).
Deep squats help you gain more strength and muscle than half squats, which adds to a better transfer to most sports (including vertical jumping, which actually looks more like a half squat than a deep squat).
If you are going to do deep squats, then my recommendation would be to go down as far as mobility allows. Not only do you get the benefits of a greater range of motion, but most people discover that they can actually lift more weight.
Stick or stagnation point
The point of stagnation of most people in the squat (the point where the bar slows dramatically and the point where most people fail a squat) is a little above the parallel. If doing a deep squat, the most difficult point of the lift will not be your lower position, it will be halfway, so it will not make the lift more difficult to sink a couple of centimetres deeper.
When you cut a squat in a position higher than your natural lower position, assuming you are in some position below your point of stagnation, you have to reverse the weight simply with an active muscular effort instead of receiving a boost from your reflex of stretching. The advantage that you get by decreasing your range of motion is generally offset by the additional effort needed to reverse the load without the help of rebound.
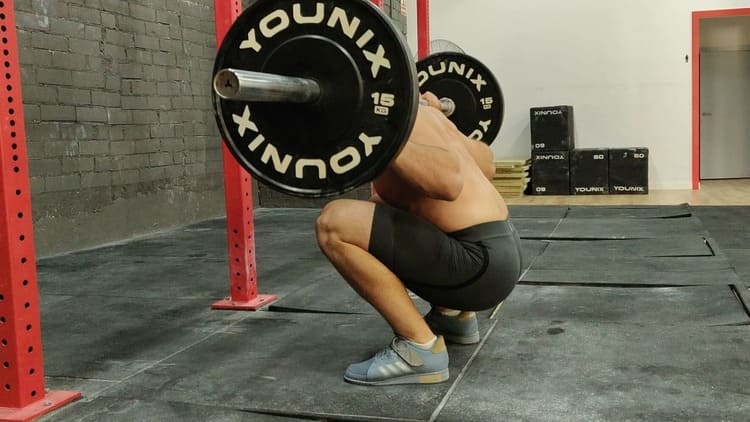
Not correct position (butt wink)
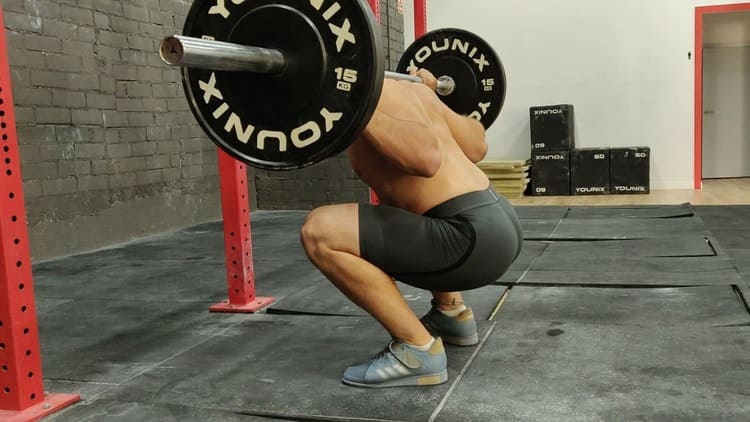
Proper position
The Ascend
The ascent revolves around the most crucial point of the survey: the point of stagnation.
The point of stagnation of most people is between 1-6 centimetres above the parallel. The exact angles of the joints vary from person to person, but occurs almost universally in the middle of the lift. Very few people are sunk at the bottom, and very few people fail once they break the point of stagnation (unless they simply lose their balance).
1. Start.
When you start pushing from the bottom of a squat, you should start the climb by pushing your trapezoids against the bar aggressively while squeezing your strong feet against the ground. The first thing you want to avoid is to lean forward and reach the point of stagnation in a ‘good morning’ position. Since the bar tries to crush it forward (imposing a moment of spinal flexion and hip flexion), pushing the trapezoids toward the bar will counteract that tendency.
For most people, their degree of inclination forward in the lower part of the squat should be maintained until it reaches the point of stagnation. Lean forward with your hips moved toward behind, the leg is reduced, which forces it to fight through the point of stagnation, mainly with the hip and back extenders.
2. Stagnation Point.
Once you reach the point of stagnation, your goal should be to cross it as efficiently as possible.
The best strategy is to continue driving the trapezoids against the bar aggressively, while trying to drive the hips under the bar. Your knees will probably also move forward.
Stick or stagnation point
Through that part of the movement, the relative muscular effort of the hip extensors is considerably greater than the relative muscular effort of the quadriceps. That means that when it fails, it is very likely that the muscles around your hips are not strong enough to break the point of stagnation, and it is very unlikely that your quadriceps were not strong enough to break that point.
When trying to drive the hips forward and below the bar, it decreases the demands of the hip extenders, which are close to their limit, and increases the demands of the quadriceps, which can handle more load. This ensures that the load remains evenly distributed between the knees and hips so that the lift is as efficient as possible.
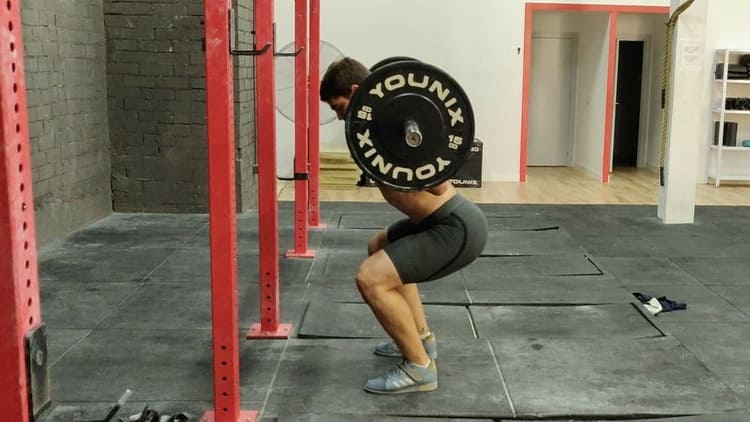
Proper Squat Form
Key Points:
Things that depend on you:
– Bar position.
– Hand position.
– Posture width.
– Foot angle.
– ‘Sitting down’ or ‘sitting back’.
– Depth.
– Shoes (as long as it has a solid sole).
– Wearing a belt.
Non-negotiable things:
– Don’t let your knees give in.
– Do not let your back bend.
Things that depend on you:
– Make the squat as deep as you can.
– Raise each repetition as explosively as possible.