When it comes to Weighted Calisthenics it may be hard to improve the weighted pull up once reached a certain level. In this post we will be talking about technical specifications so you can get better in pull ups in the long term.
Before start, we would like to say that all the tips shown here have been tested for many years by some of the best pullers in the world. All of this has been learned from reading and experience reading with an only purpose: lifting heavier weights in pull ups following competition rules and without getting injured.
It is also important to mention that changing the form of a movement may take time, and during the adaptation phase the performance may be lower than the usual. Despite, this small technique changes will really pay off in the long term.
To make this post clearer we have decided to follow the pull up movement, starting from when we grip the bar to the point where the chin is over the bar. We will look at the 10 tips and mistakes that will help you perform better at pull ups.
(It is taken for granted that fact that the height of the bar is enough to allow the athlete hang fully stretched without reaching the ground with its feet.)
Let’s jump right into it!
1. A very common and important mistake: gripping the bar too loose
Having a good grip is crucial, basically because it’s the only point of contact with the bar and where all the force will be transmitted in order to ascend. This is one of the most common mistakes as many people does not pay enough attention to such an important factor.
The bar must be gripped with strength, using an overhand grip and with the certainty that our hands will not slip or lose the overhand grip during all the pull movement.


Paying special attention to that before starting the pull up will allow you to produce more force while reducing the distance you need to ascend by nearly 1 centimetre. This will also produce a sensation of more confidence and strength.
In order to perform the grip, it will be very useful to have a box or step where the athlete can stand and grip the bar comfortably.
Good, now we are firmly gripping the bar and ready to leave the box or platform we were, in order to swing and start pulling. Wait… What about that swing?
2. Swinging too much… it is bad!
This mistake although not being as common as the one said before can also lead to a decrease in pull up performance. This is because an excessive swing at the bottom pull part will turn to a big swinging during the pull movement. This big swinging will make instabilities appear during the pull and force the path to have an “S” shape. This curved path is not optimal because moving too far from the bar will make much harder to end the pull up.
The swinging needs to be minimal. This is why we recommend placing the box/platform really close to the bar in order to avoid that much swing.
Also, in many competitions swinging is not allowed or needs to be very minimal.
And now… Can I start pulling? When should I start?
3. Common beginner mistake: the pull starting point
The upwards movement must start when the swing is about to reach the maximum forward position. This way we will move backward as we move higher and will be easier to overcome the bar and reach to the top of the movement.
The real problem appears when the pull part starts while going backwards, forwards or at the maximum backward position. Then is when the swing completely interferes with the optimal pull path and efficiency is lost.
When lifting weights close to your maximum this really takes a huge impact on the pull up performance as the puller will be unable to control and perform the proper path.
In the case where there is no swinging, it is recommended to find a tempo using your breath in order to teach your body a sequence to start the pull up.
Am I ready to start the pull? There is something we need to avoid:
4. The hidden mistake: Starting the pull asymmetrically or dropping before start
Reading the title for this mistake may make you feel that this is very obvious and clear to see, but usually this is not the case. This is why we need to look carefully in order to detect those slight pathologies. Here we will see an asymmetric pull up start and a dropping before start example in slow motion:
As you can see this are very small details that definitely need to be changed because it can cause injuries.
The proper position to start should be a neutral position where there is no small dropping and both arm pull simultaneously.
The neutral position is the one recommended as starting too loose will make the distance longer and make the body too relaxed in order to exert maximum power. Starting in full retraction will make you lose strength before even starting the pull.


Let’s start with the ascend, but… What about our legs?
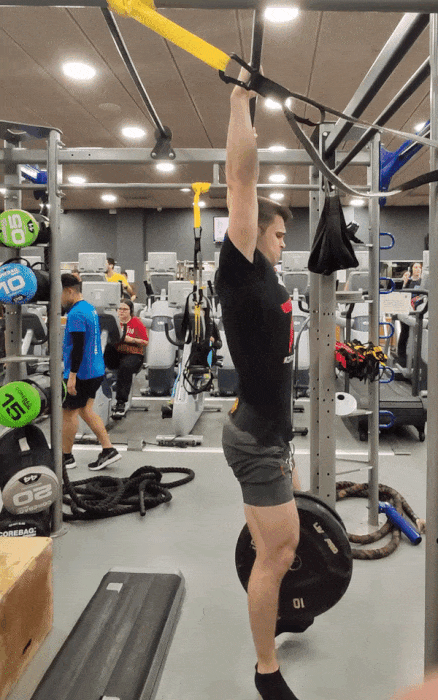
5. Legs can really help you pull heavier, and with no kipping.
Legs need to remain in the same position during the pull in terms of knee flexion. That means that if you start the pull up with stretched legs you need to maintain it through the hole movement. It would also be valid to start with bent legs if there is no knee angle variation.
We are not going to discuss which way is better as this depends on each athlete, but sometimes it’s better to slightly bend your knees to have a better grip for the weight.
But, how can the legs help? Well, legs need to be tightened and pulling backwards. This way the glutes will also tighten. Why this?
Glutes and lats are connected to each other through fascia (heavy connective tissue). This means that contracting the glutes will allow the lower lats to contract even stronger and therefore increase the pulling strength.
This is why combining the start of the pull with the contraction of the legs and butt will increase the initial pulling strength. This tension can be maintained through all the pull phase except for the top part where the lower body tension can be driven forwards to help passing the chin over the bar.
You will be happy to read that there is something more you can do to improve that initial pulling part along with retraction.
6. You really want to bend the bar
For other movements such as bench press it is very useful to simulate/imagine as if you wanted to bend the bar. This will facilitate a proper scapula position along the exercise. This is why keeping that in mind is so important.
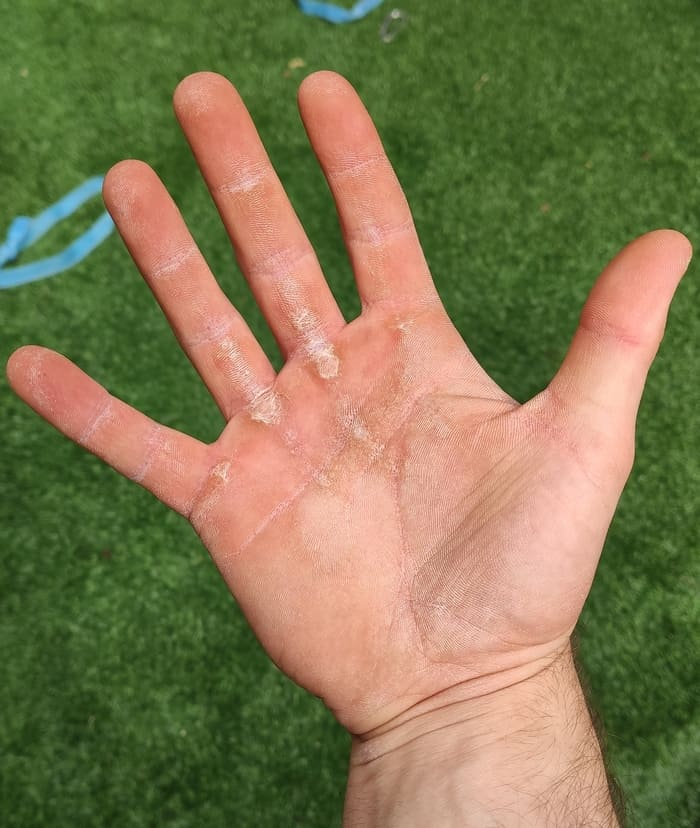
You want to feel the weight on your outward fingers (near the pinkie) and not homogeneously along the hand. Notice in the picture how the calluses are much remarkable in the outer fingers.
And… One last thing before actually moving forward to the pull part, what should we do with our head?
7. Never look down, actually… look up!
That is a very important point to keep in mind as will help us with our proper scapula positioning. The fact of hanging and looking upwards to the bar will make it easier to get proper retraction when the pull starts.
So, just before you start pulling just try looking to the bar. Moreover, this will produce a more confident sensation as looking in the direction of the movement will guide us visually and help us to complete the pull.
Wait a minute… We have already talked about 7 ideas out of 10, and we are still hanging on the bar. With this, we want you to realize how crucial a proper setup is before starting the actual pull…
Alright so now we can start pulling, our grip is strong, the swinging is not excessive and the lower body is tight. Now let’s talk about probably the most fundamental pull basics:
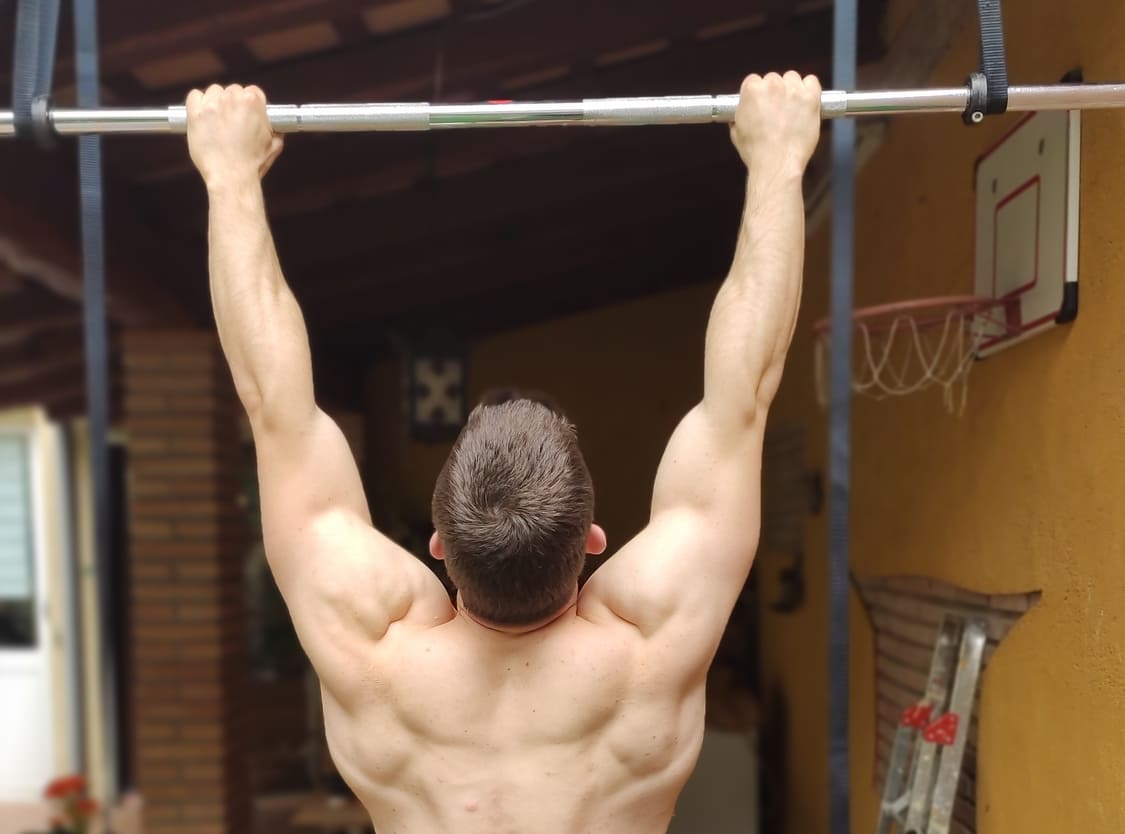
8. Losing retraction during the pull up: easy to say
This is for sure the hardest, and what will make you complete the pull up or not. Maintaining the scapular retraction and depression will allow to produce the maximum force and reach the needed height to complete the pull up.
Retraction: bringing the shoulder blades towards each other (or towards the spine).
Depression: moving scapula downwards (opposite to elevation). Like if you were trying to bring your elbows to your hips.
It will be much clearer with an example:
The ascend of the pull up starts by tightening the back, not flexing the elbows.
The hard task will be maintaining this retraction and depression during the pull, as will be very challenging when managing heavy loads. Let’s see a clear example of lost retraction:
Just try it by yourself, here you have an example of how powerful can a proper depression be.
We are reaching the end… Here is another tip that can really help you bring that chin over the bar.
9. Pulling too far from the bar… needn’t: just pull high
This has a lot to see with retraction. Sometimes it may feel that to do a proper retraction you need to arch back or move too far away from the bar. That is not necessarily true, you can actually have a proper scapular position without having to go too far away.
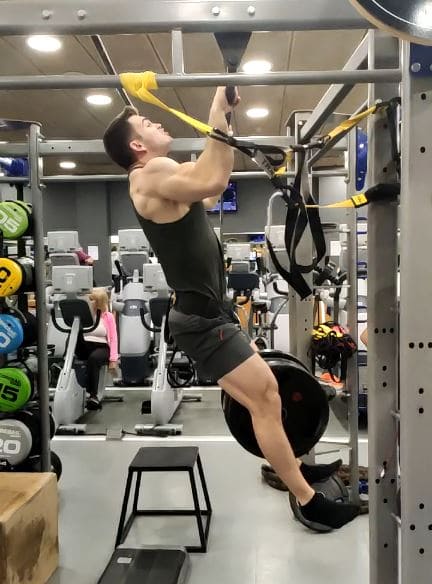
Going further backwards will make the final pull part harder, as you will need to maintain the height you reached while you moving forward to pass the chin over the bar. Notice that this mistake can also be caused a by large swinging as stated in the upper section. See the example of a too far pull up!
A very good tip in order to reach the bar is to concentrate on pulling high. Imagine as you wanted to bring the bar to your chest and don’t stop pulling. When lifting heavy loads, you should always try to reach as high as you can with the pull part. Forget about passing the chin for a moment and concentrate on just one thing, moving upwards. Reminder: Do not forget to maintain the depression on your scapula as this will make you lose height.
Good! We are pulling high, our legs are pushing backwards, our butt is tight, our grip is solid and trying to bend the bar, our depression and retraction is pretty solid and… there is just one more thing to do.
10. You are nearly at the top, don’t screw it now!
You made it to the top part, you see the bar below your eyes and you are ready to pass the chin over the bar. At this point is very important not to lose height, and make the position “chin over the bar” the highest of the hole pull up.
A very common mistake would be to just “throw” yourself towards the bar. Don’t do that. When doing that your elbows will move apart and outwards while you lose the scapular position you managed to get up there. Instead, try focusing on bringing your elbows close to your body and backwards like if we were doing a horizontal row, without losing height.
Will be much clearer with an example:
Well, we did it. We hope this pull up overview helped you improve your technique or fixing bad habits. As said in the top adapting to changes will take some time and effort but will be profitable in the long term. We are open to discuss any topic you like in our forum.
Thanks for reading! Don’t forget to share this post to help others!